POST Example
Summary: This tutorial shows how to create an Inbound API Service using HTTP POST in Plinqx Publisher, parse an incoming JSON payload in a Flow, create or update an Account record, return a JSON response, and validate execution v
POST Example
This tutorial shows how to create an Inbound API Service using HTTP POST in Plinqx Publisher, parse an incoming JSON payload in a Flow, create or update an Account record, return a JSON response, and validate execution via Transactions.
Overview
You will: - Create an inbound POST API in Publisher - Parse a JSON payload in a Flow - Create or update an Account record - Return a JSON response - Verify results in Transactions
Steps
Step 1: Create API Service
Procedure - Access the Plinqx Publisher. - Create a new API service with an HTTP POST method. - Link the API to your Flow.
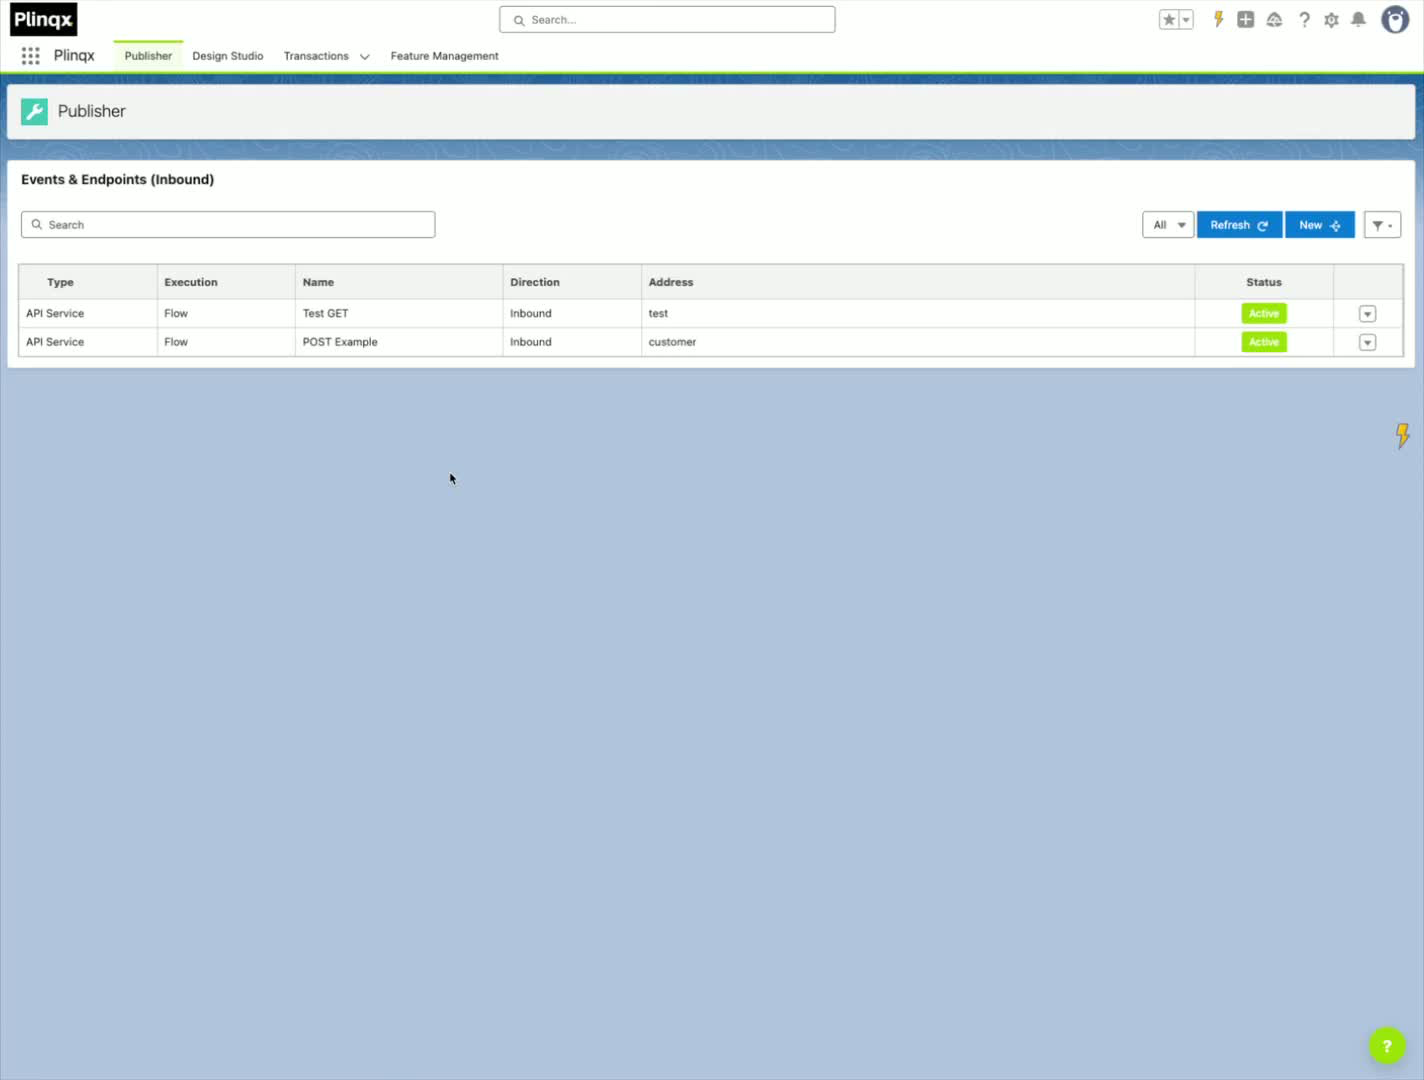
Step 2: Configure API Details
Procedure
- Provide a name, category, and description for the API.
- Set the endpoint (for example, Customer).
- Optionally, add multiple URI paths if needed.
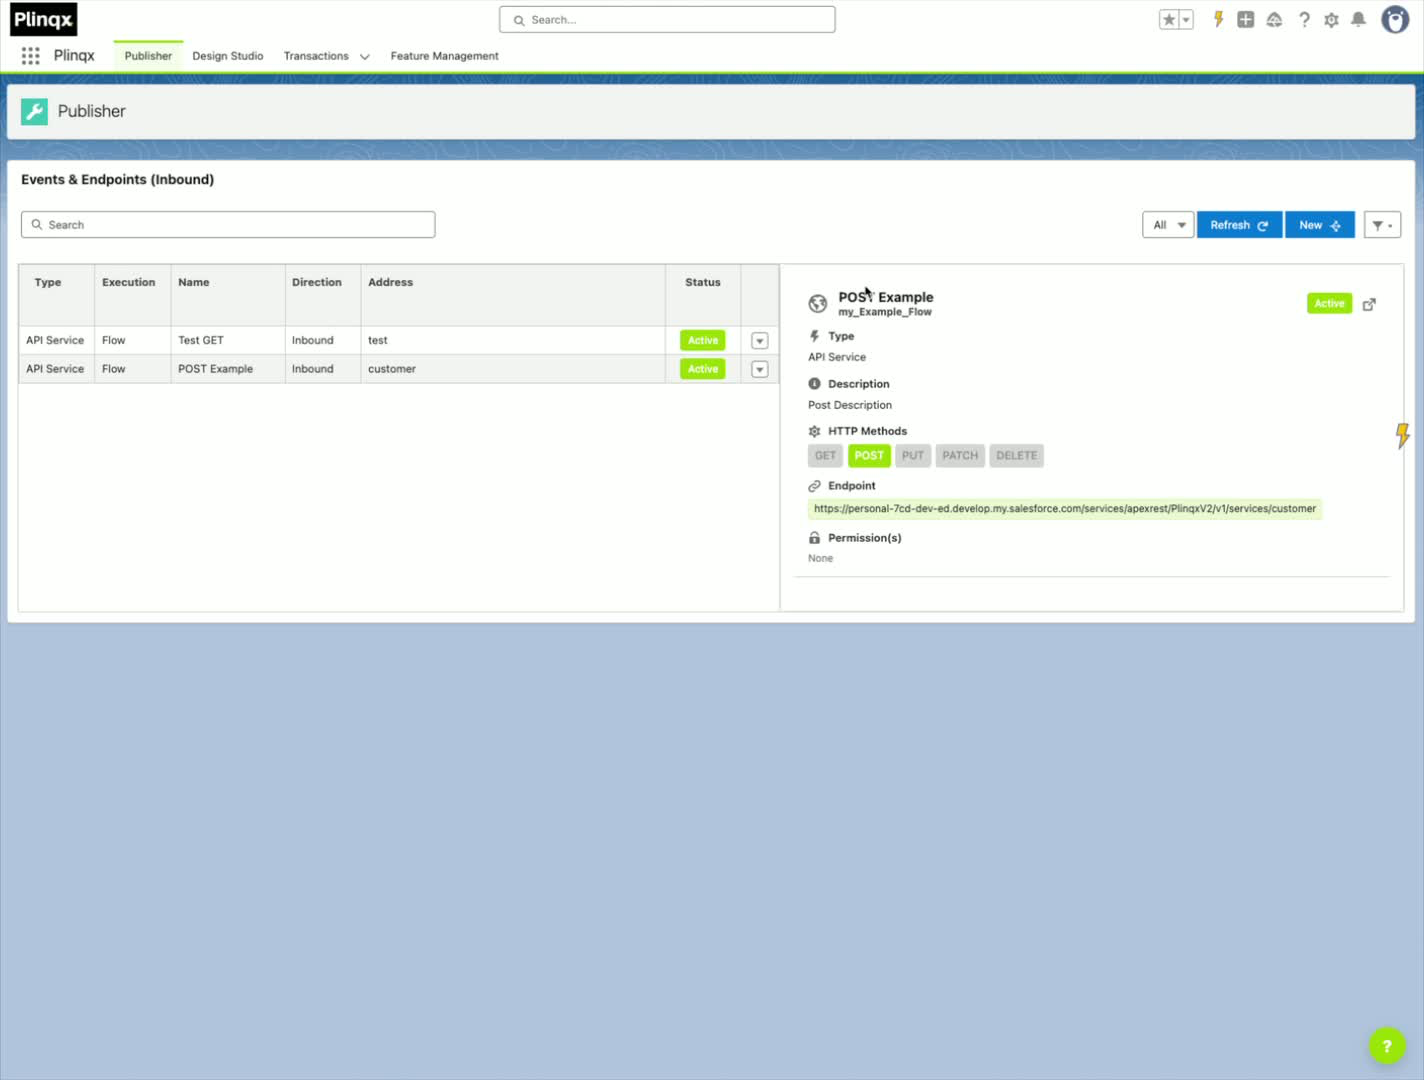
Step 3: Set Up Payload and Flow
Procedure - Ensure the Flow is activated. - Set the payload type to Flow. - Select your flow from dropdown OR create a new using the New Flow option. - Once deployed open your flow.
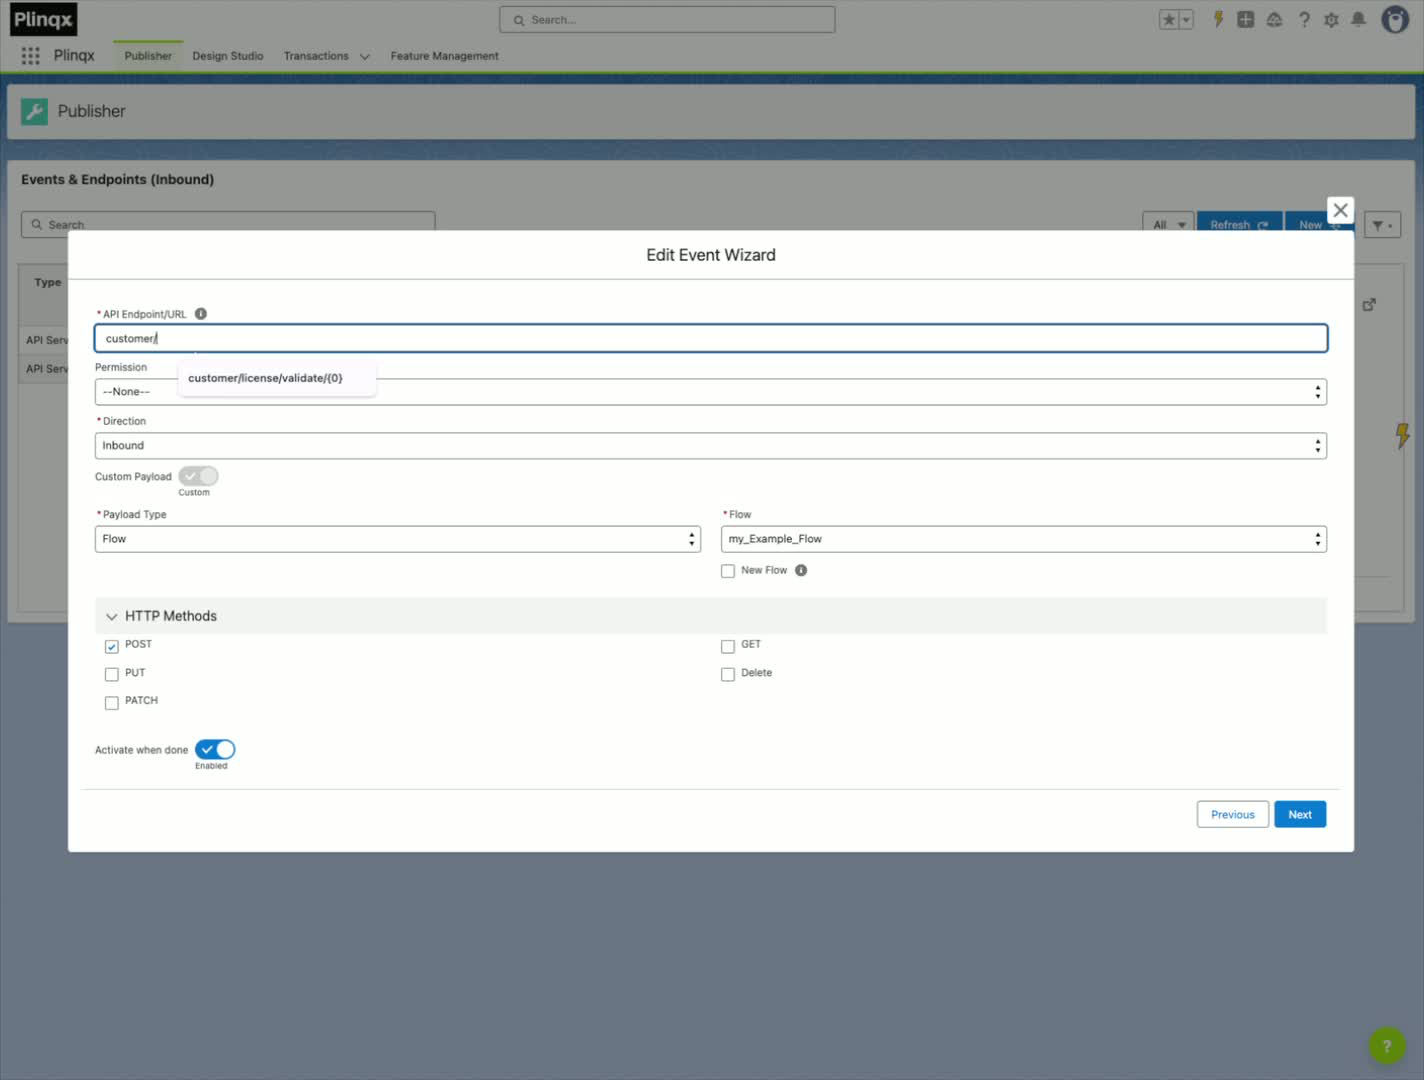
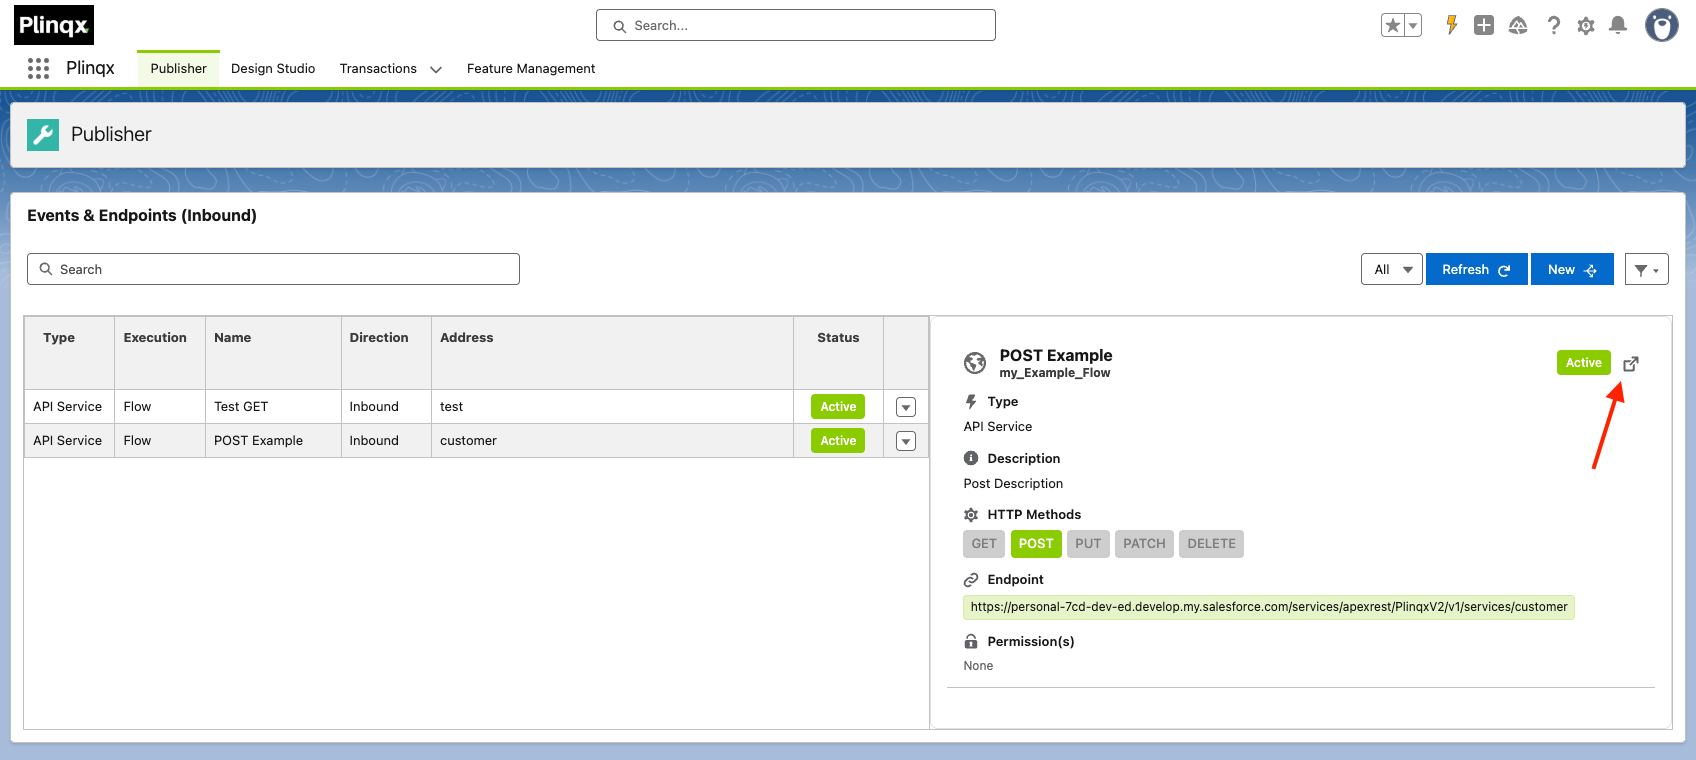
Step 4: Parse Request Body
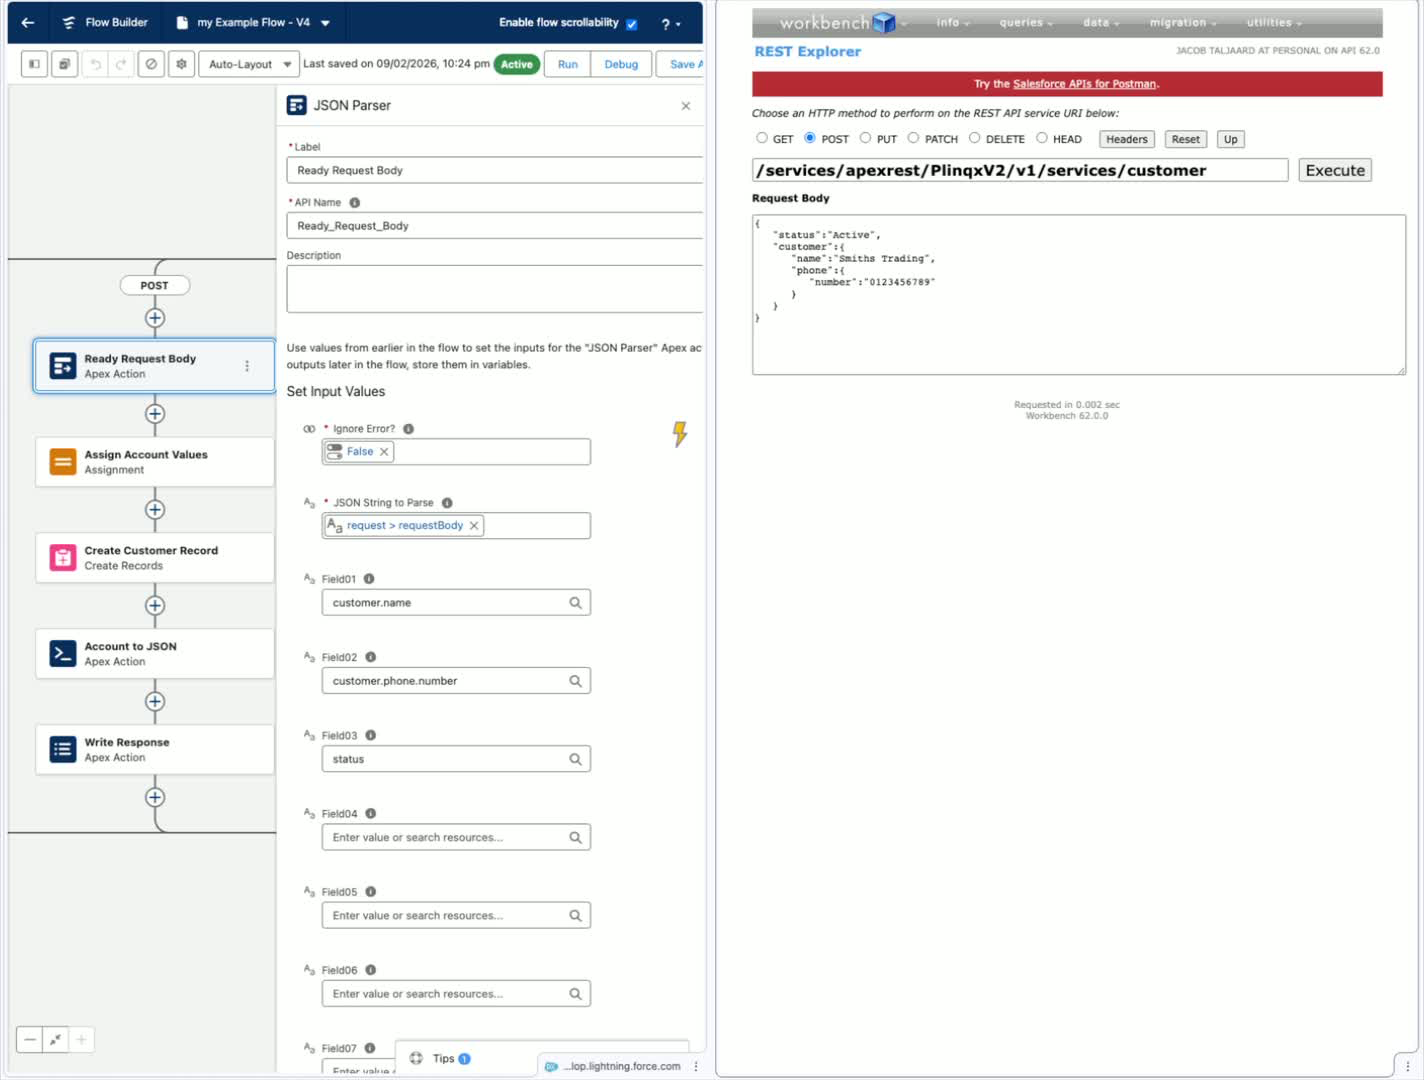
Procedure - Use the endpoint to post data. - Set the JSON body to be parsed.
Step 5: Configure JSON Parsing
Procedure
- Set the first parameter to ignore errors as false - we want to catch any errors for invalid JSON data.
- Read the following fields from the request body:
- Customer.Name
- Customer.Phone.Number
- Status
Step 6: Assign Values to Variables
Procedure
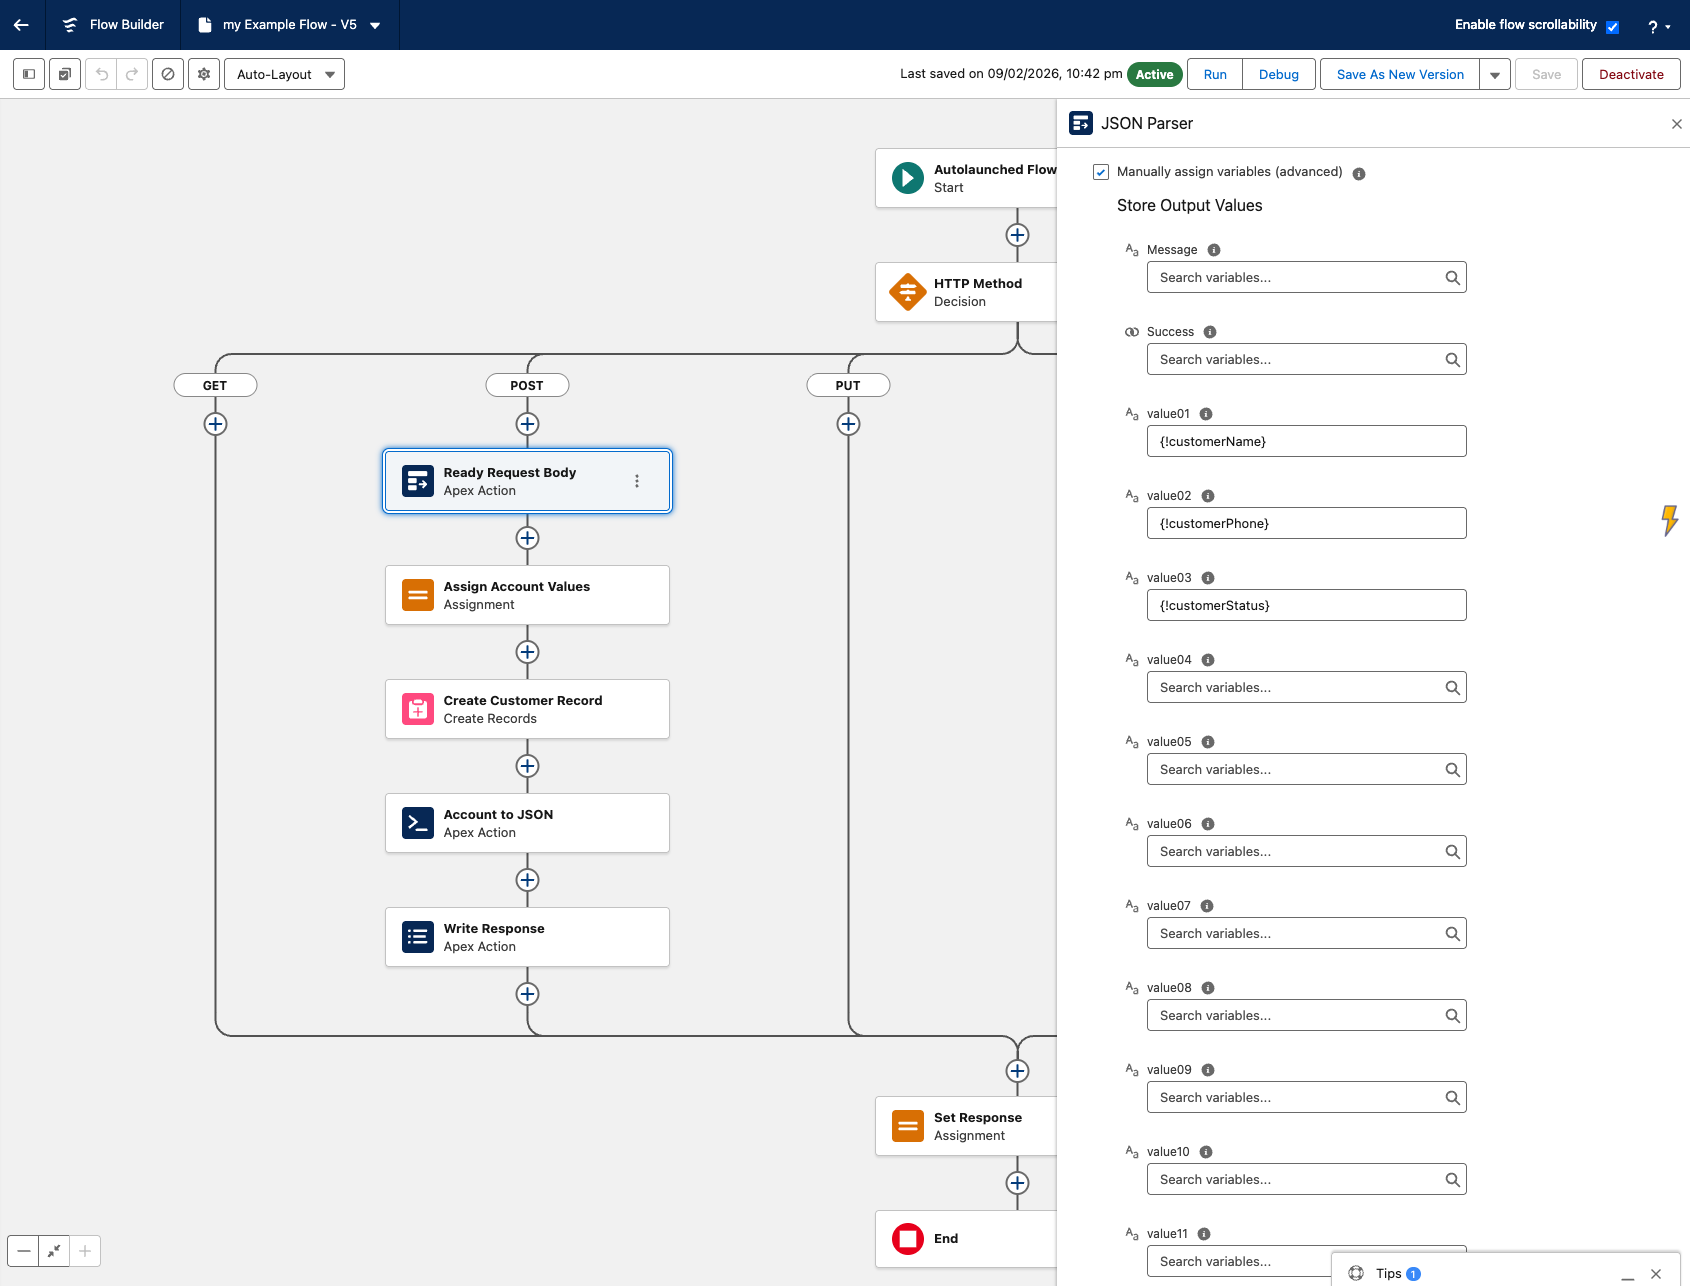
- Assign the parsed values to variables:
- Field01 -> Customer.Name
- Field02 -> Customer.Phone.Number
- Field03 -> Status
Step 7: Create or Update Account Record
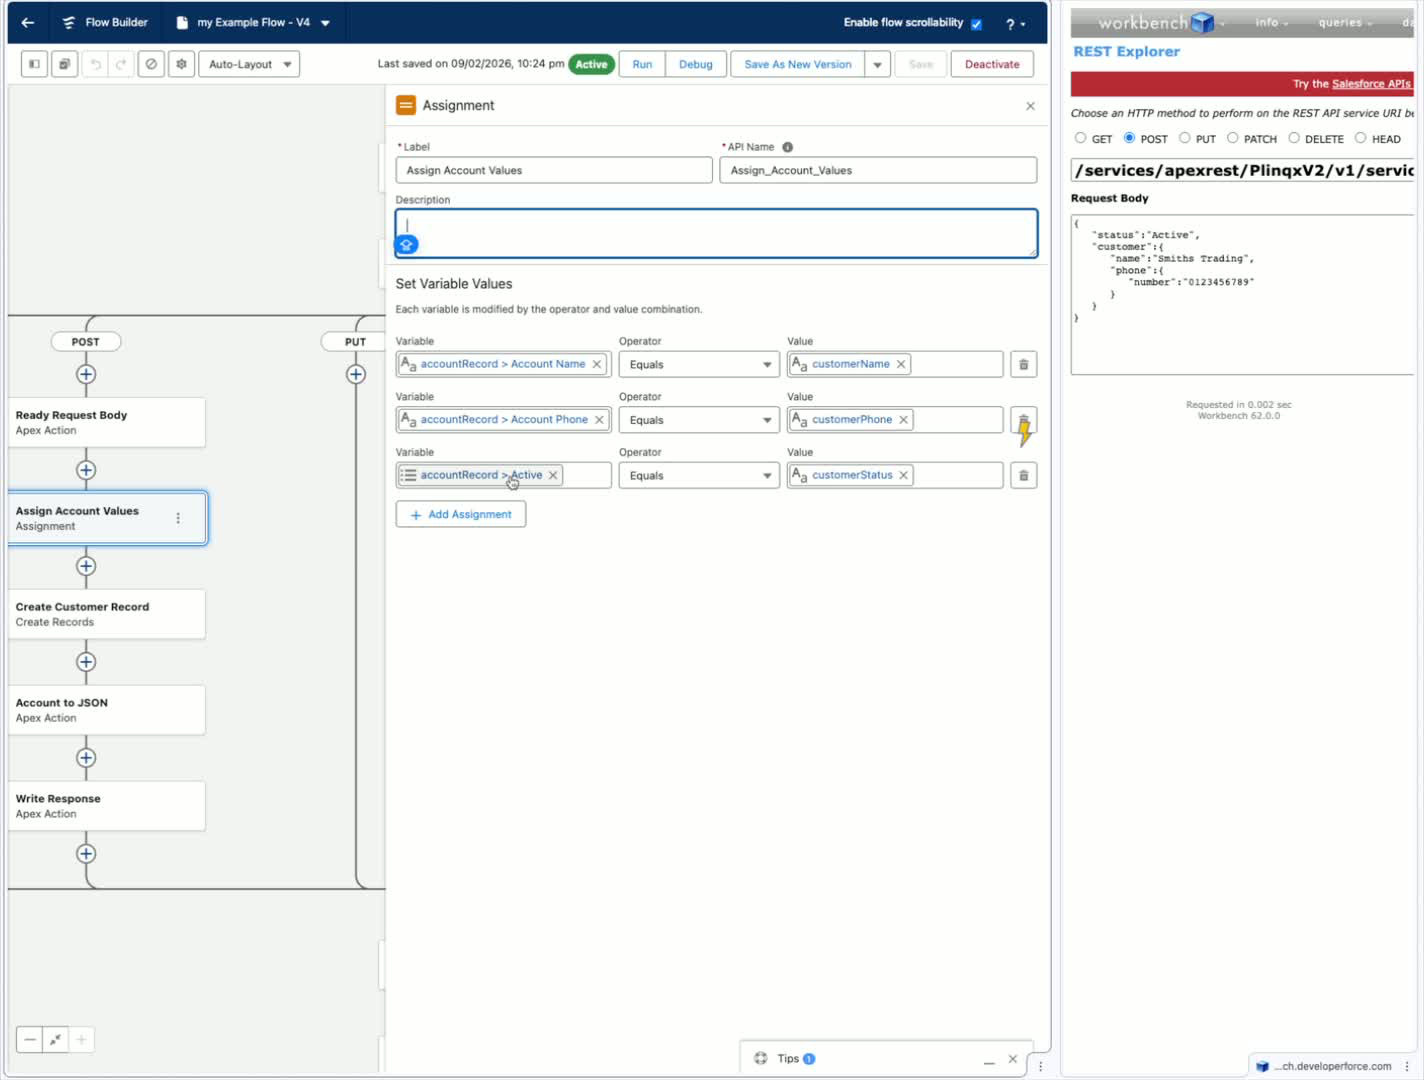
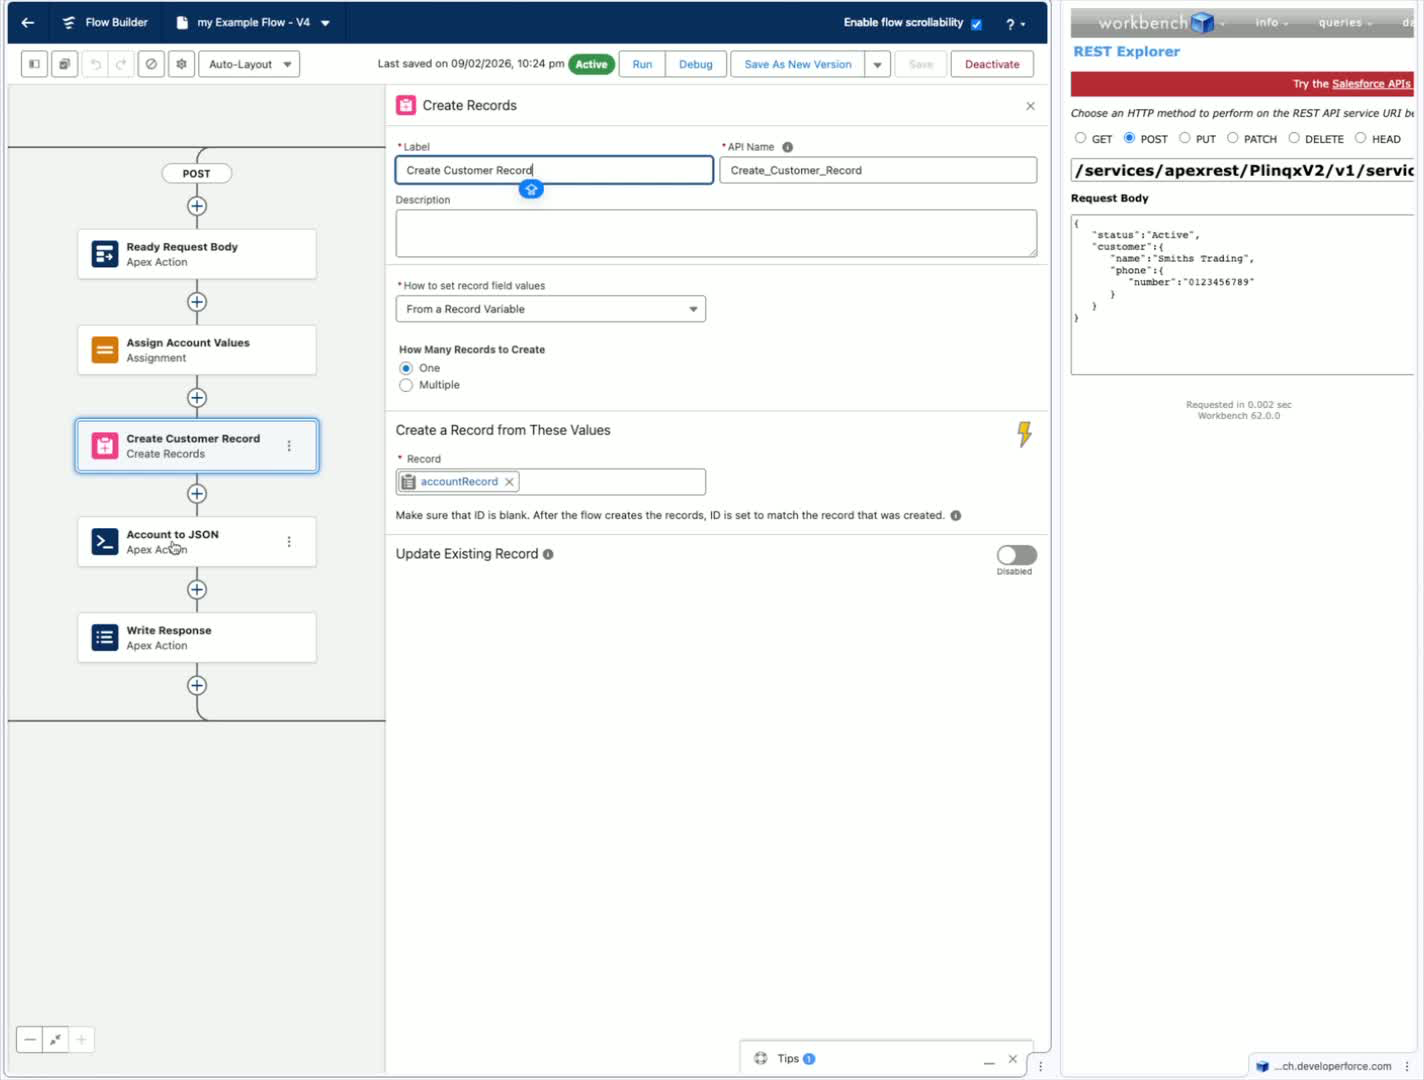
Procedure - Assign the parsed output variables to your Account variable record. - Create your account (This can also be an update if you are doing updates through your POST)
Step 8: Prepare JSON Response
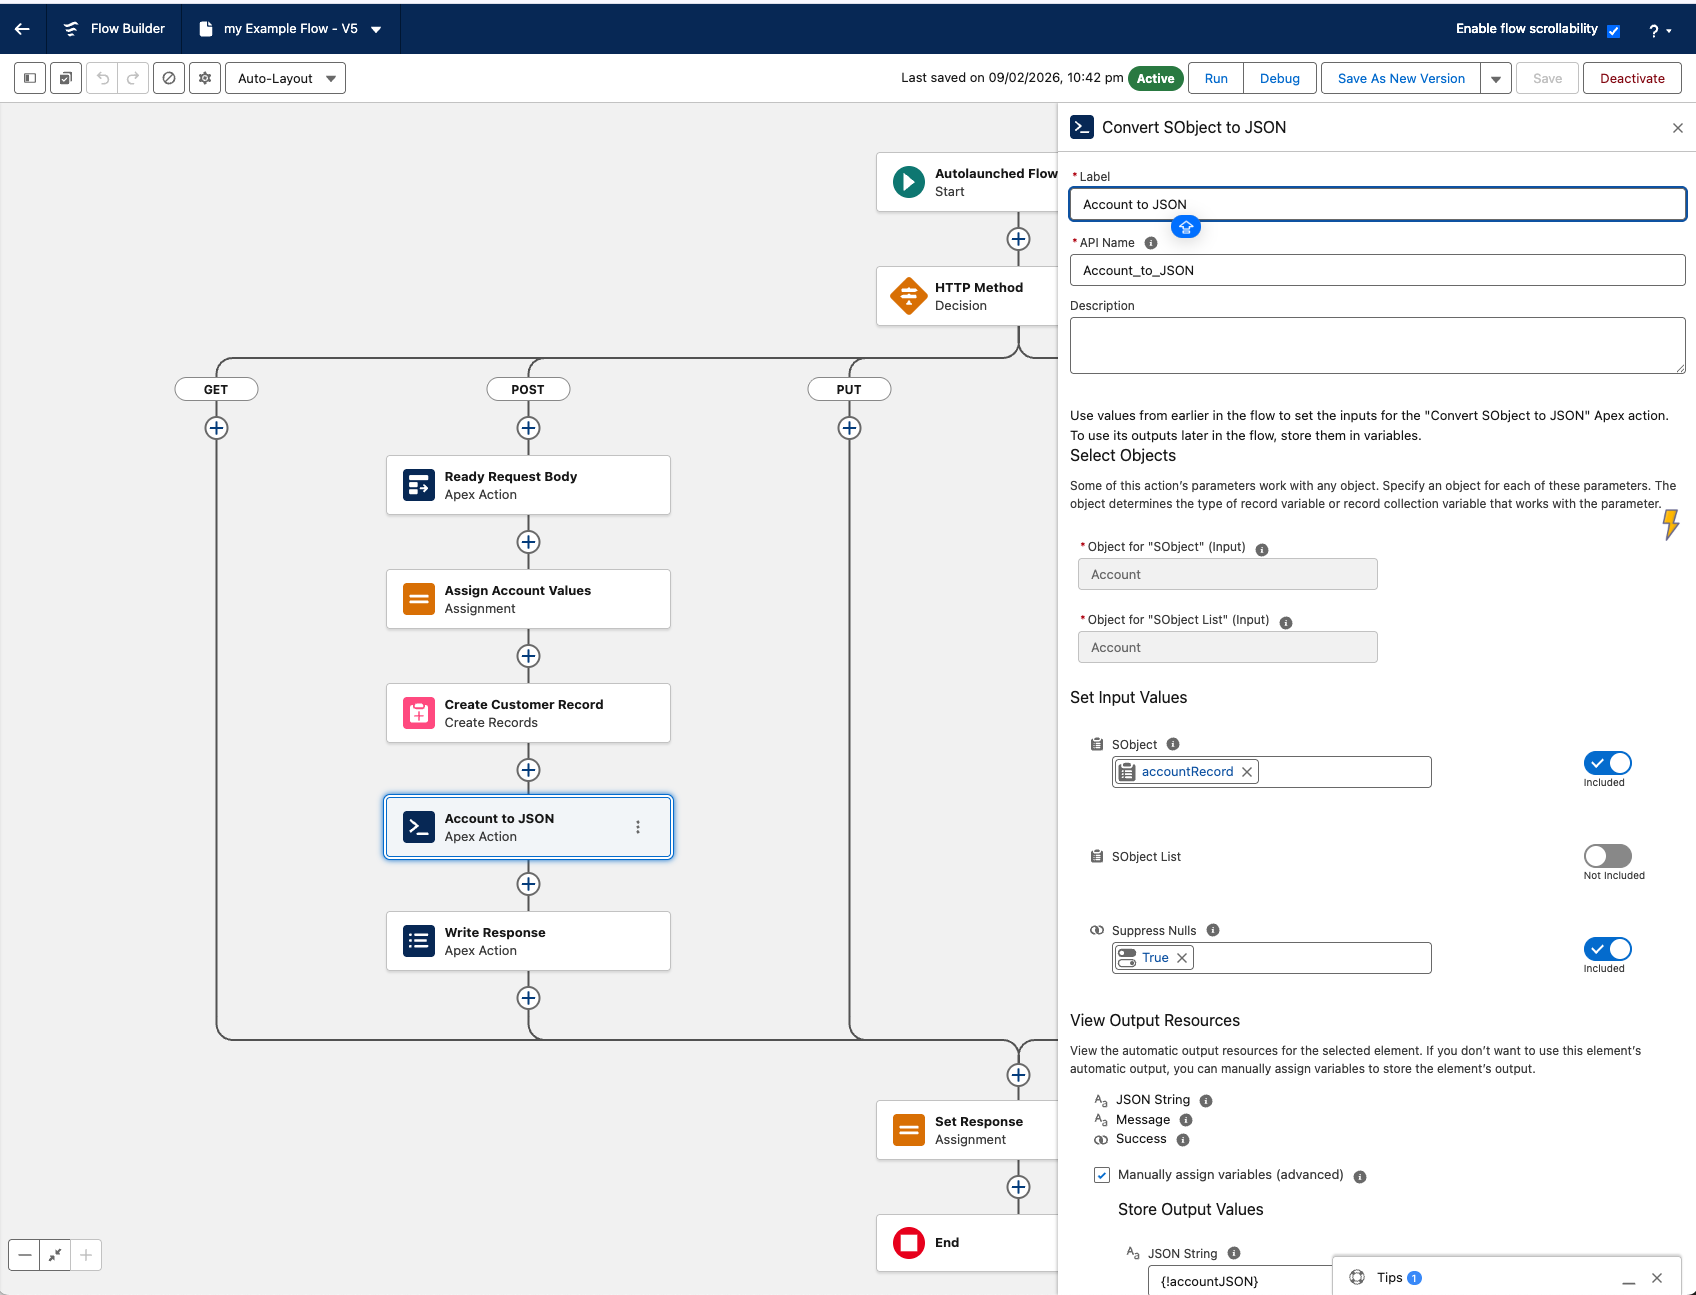
Procedure - Create a JSON object for the response. - Convert the created Account to JSON.
Step 9: Write Response Body
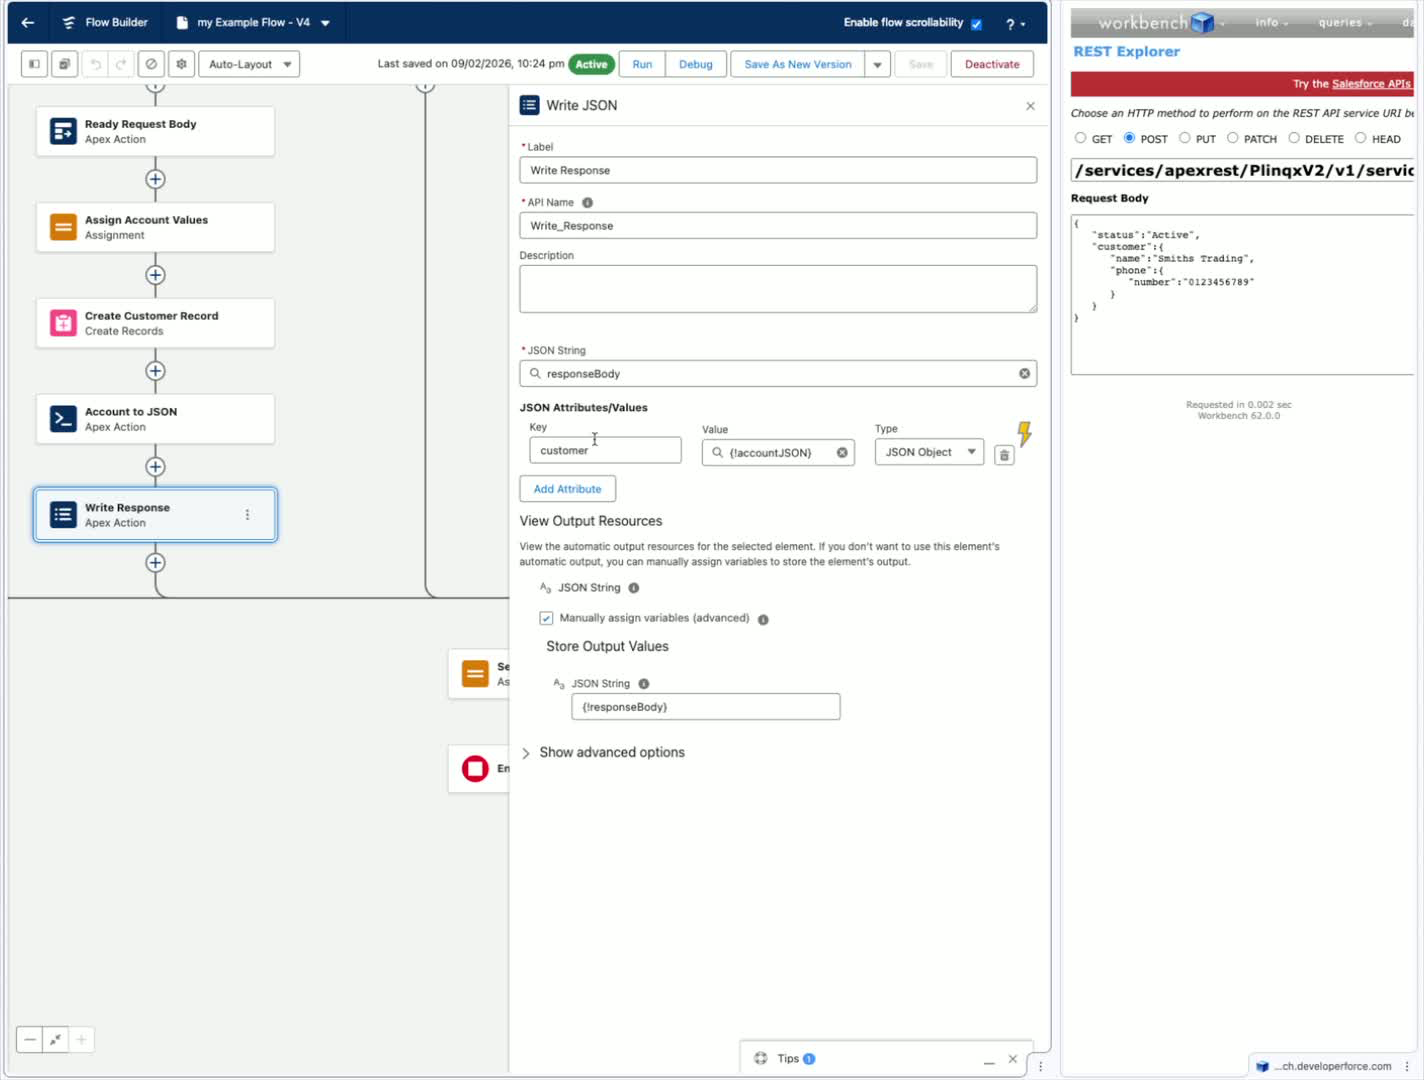
Procedure - Write the response back to the API using the response body variable. - Ensure the response body is defined as an empty JSON object ({}).
Step 10: Send Response
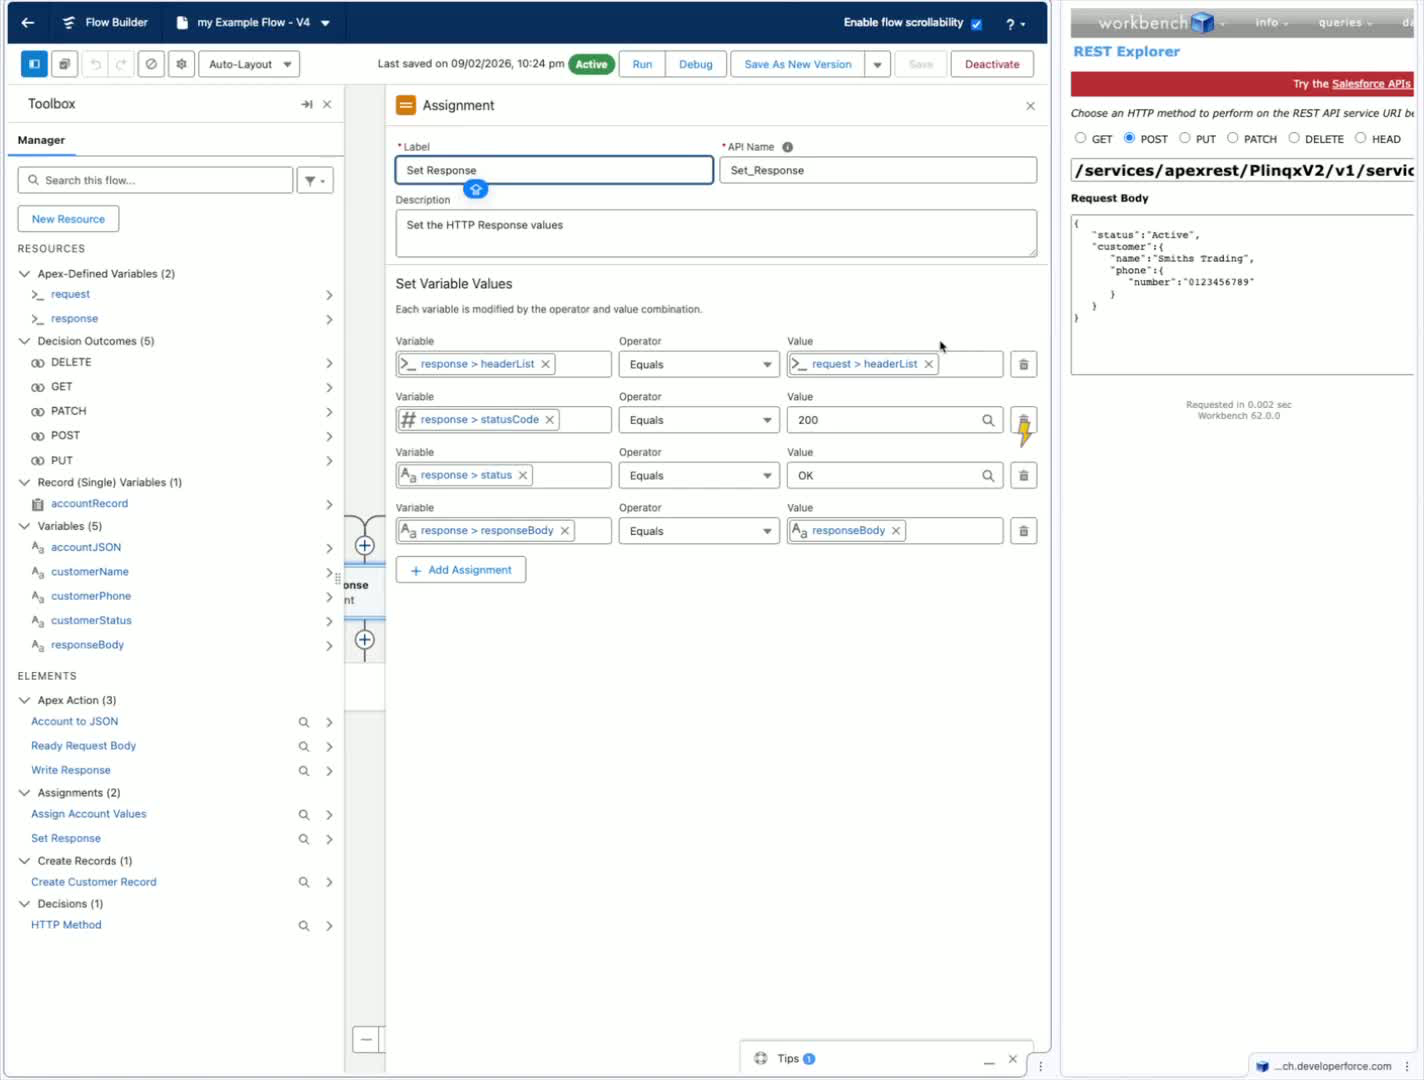
Procedure - Respond with a 200 status code and an OK status. - Include the response body in the API response.
Step 11: Test the API
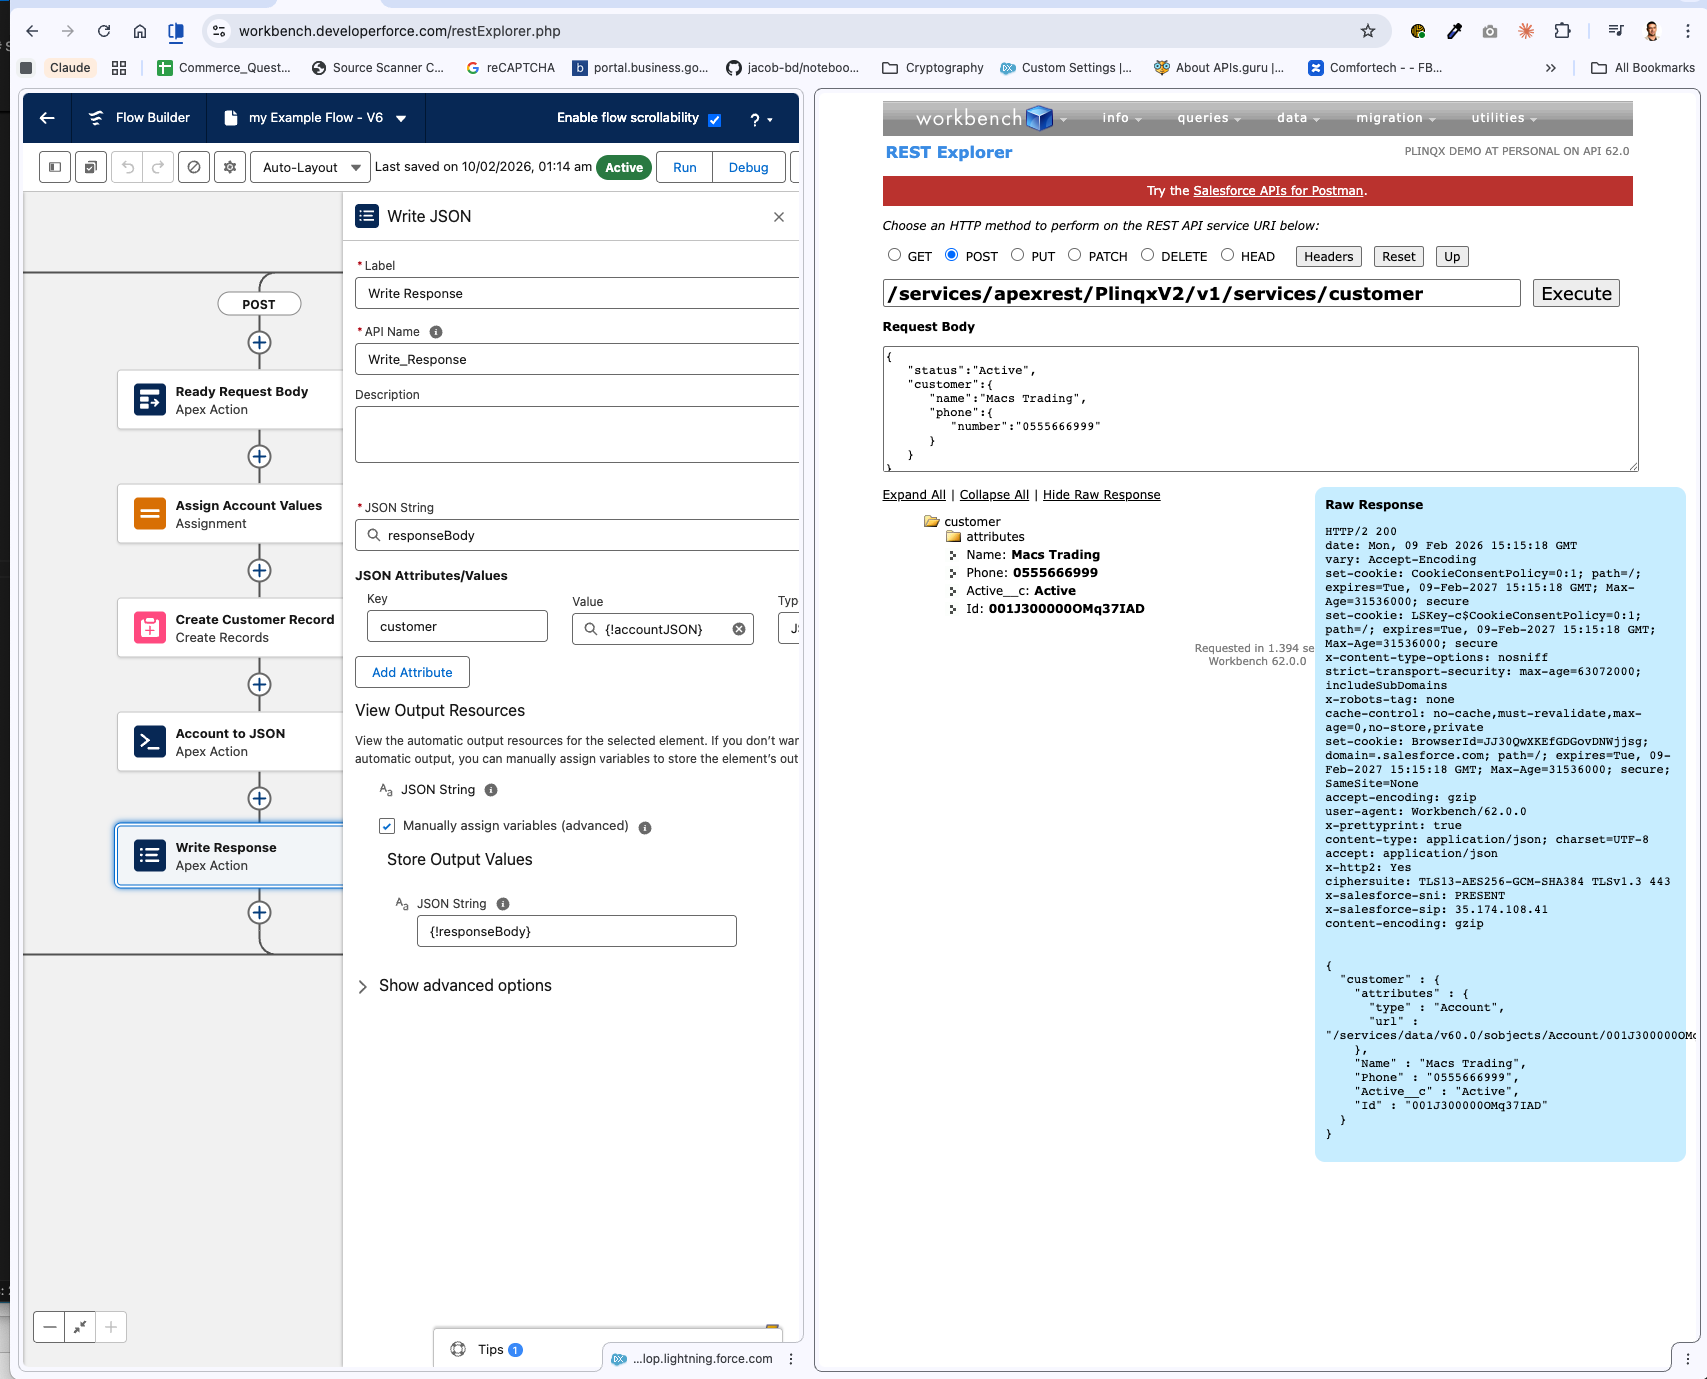
Procedure - Test the API by sending a request with account details. - Verify the response and inspect the raw response.
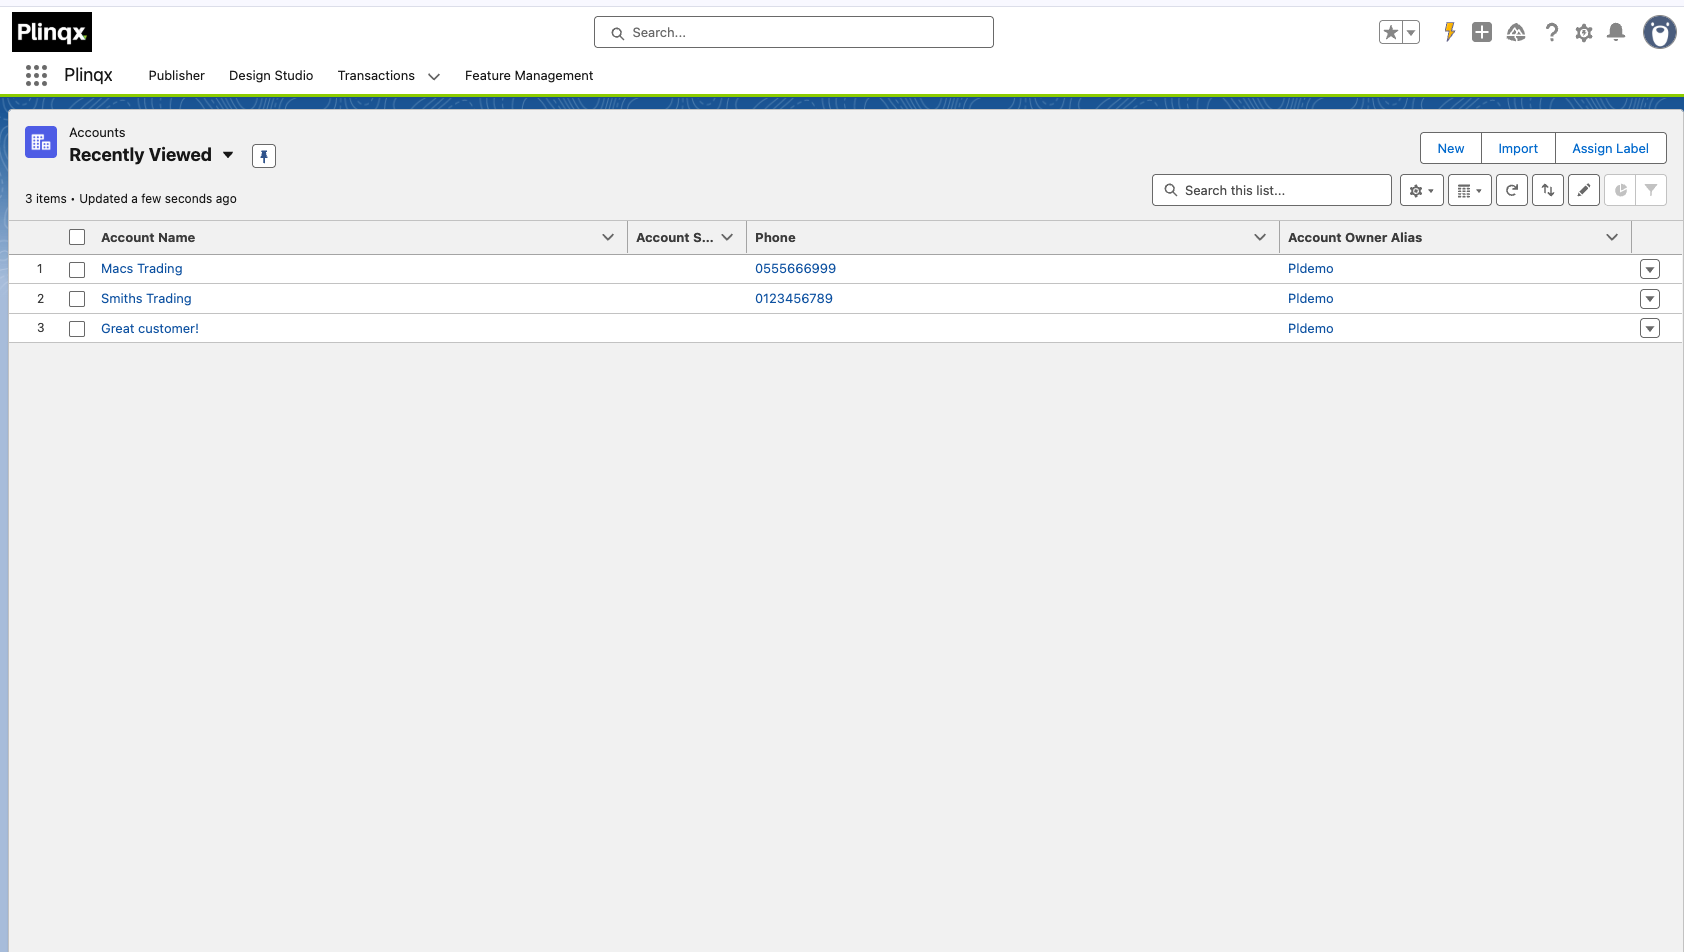
Step 12: Verify Account Creation
Procedure - Check Accounts to confirm the new Account has been created with the provided details.
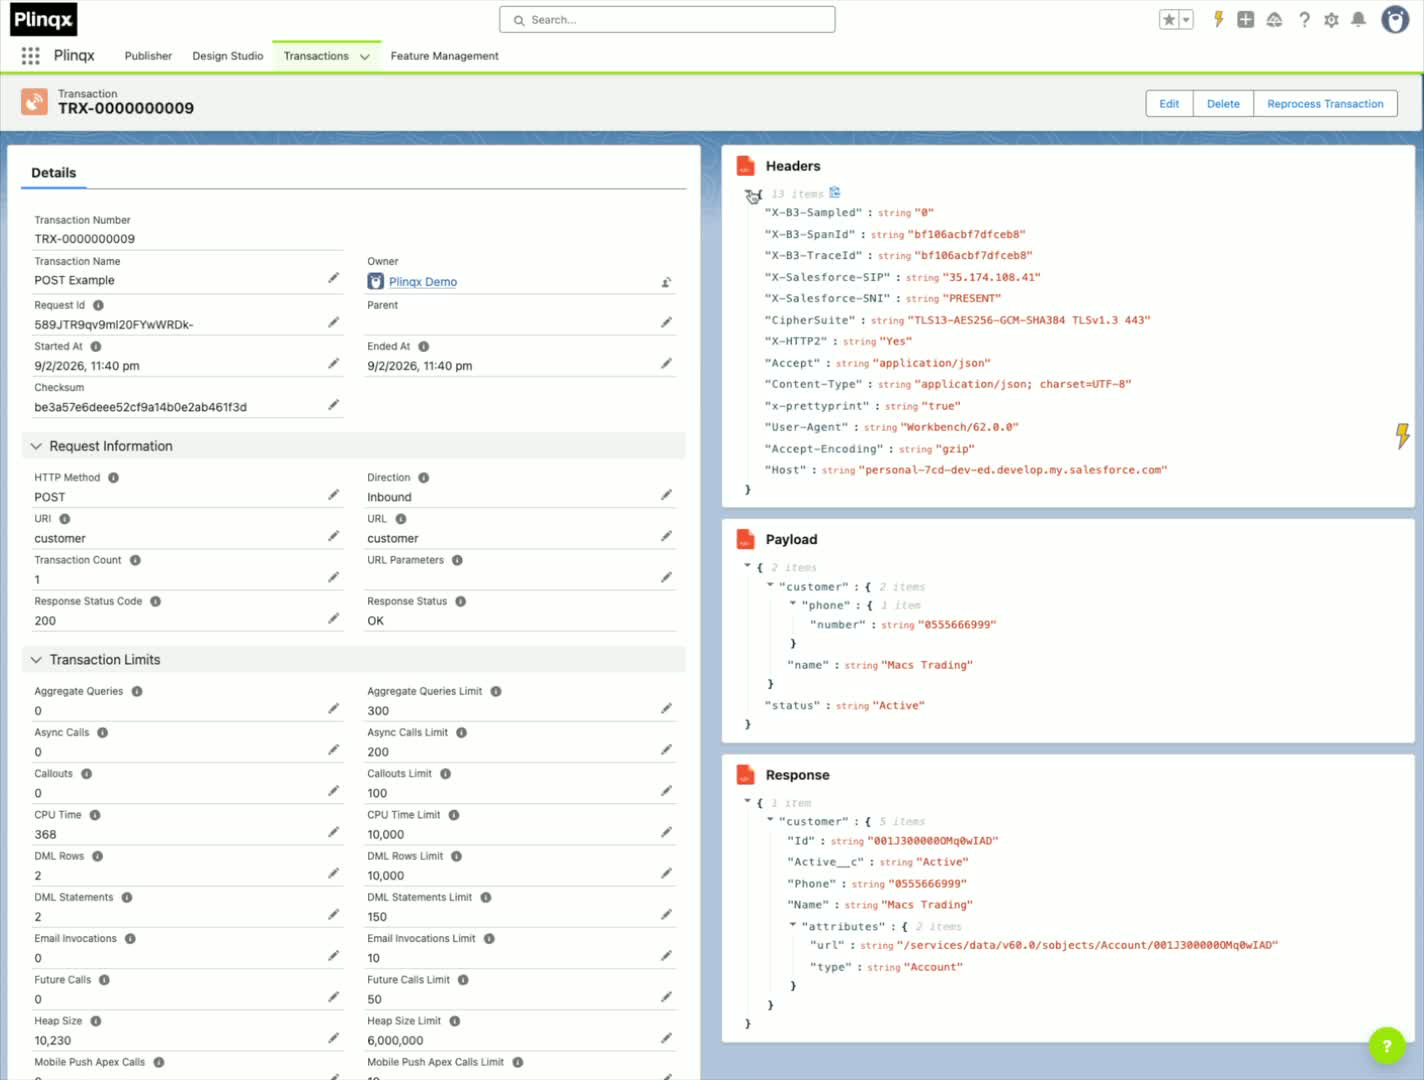
Step 13: Inspect Transaction Records
Procedure - Navigate to the Transactions tab in Plinqx. - Open the transaction record to inspect the payload and response.
Cautionary notes
- Ensure the API is activated before testing.
- Double-check the JSON structure to avoid parsing errors.
Tips for efficiency
- Use descriptive names for variables and endpoints for easier identification.
- Regularly test the API after making changes to ensure functionality.
Need help?
Talk to the Plinqx team about setup, integrations, or licensing.